How to Draw Human Hair
Hair is very important for our characters, lending a personality of its own, so drawing hair exactly as we imagine it can be a real challenge.
But there are many different approaches we can take! For me, the most important rule is to understand what I am drawing, so that I don't get lost halfway through.
1. Construction and volume
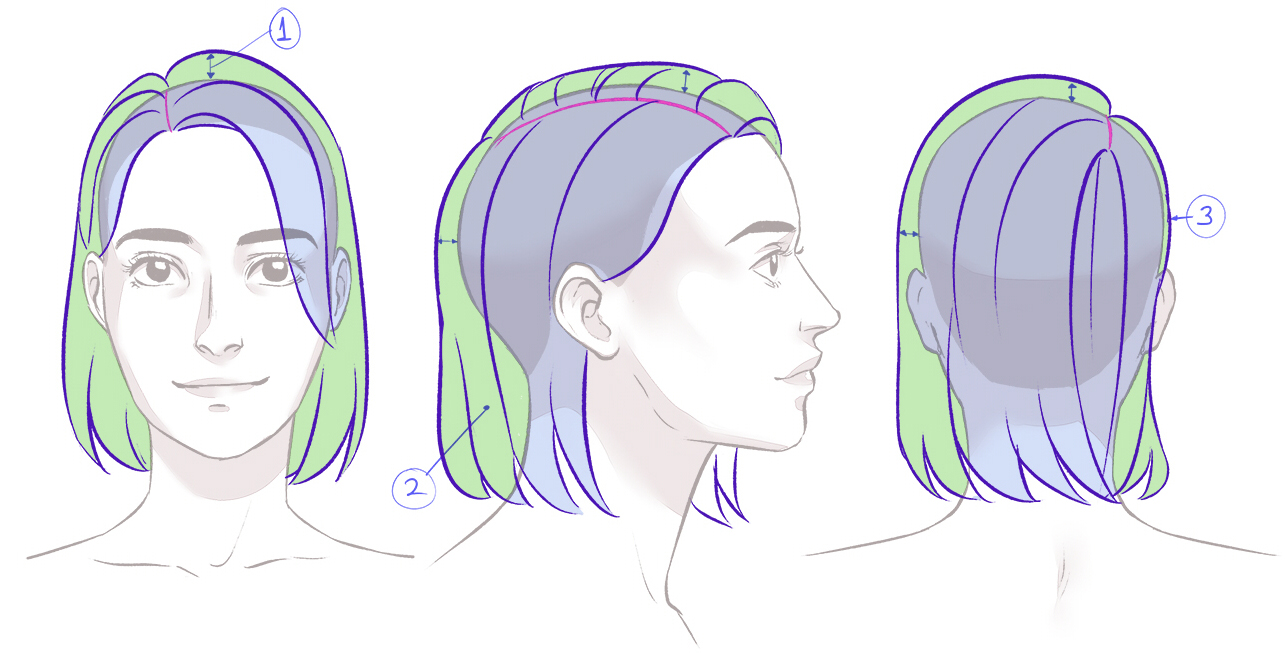
First, we must define the areas of our character's hair. Marking a reference point or a route which divides the hair can help us. For instance, at the hair parting (1). From there, it becomes easier to see the direction that each section will take (2).
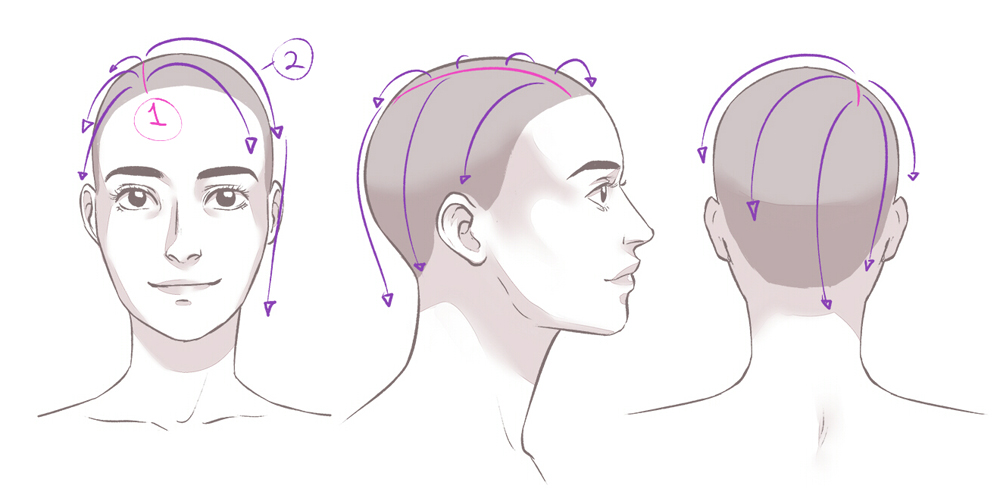
As my drawing advances, I ponder some possibilities. This character will have straight hair, cut just over the shoulders. I think no bangs would be better, but I want some hair to cover one eye, and the tips of the hair to curl inwards.
I start to draw these lines. I might change my mind later on, but this stage allows me to see more clearly.
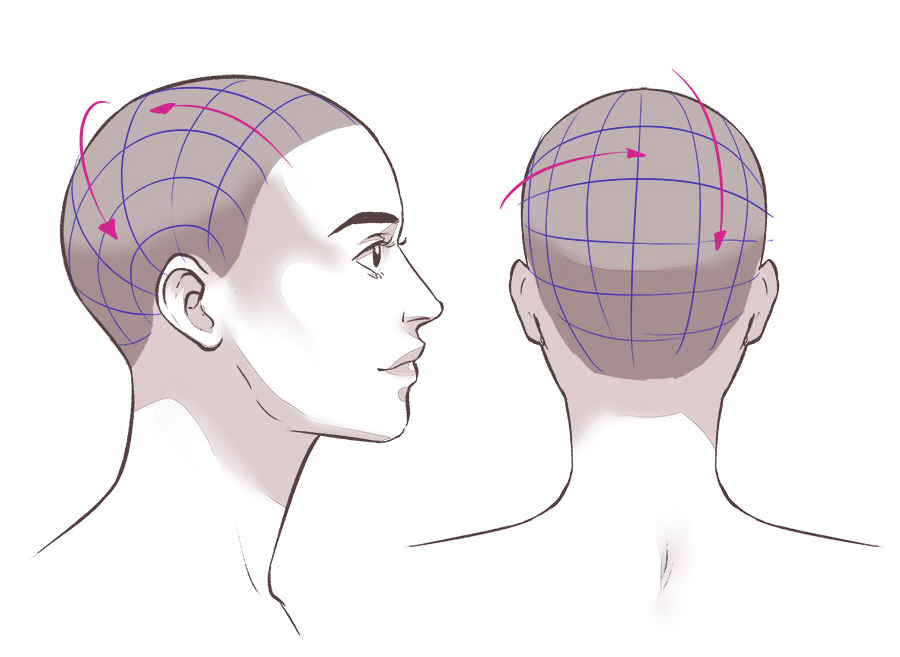
The head is a sphere. If we don't take that into account, the drawing could start to flatten. This is a fairly common error. Let's have a look using a mesh to demonstrate:
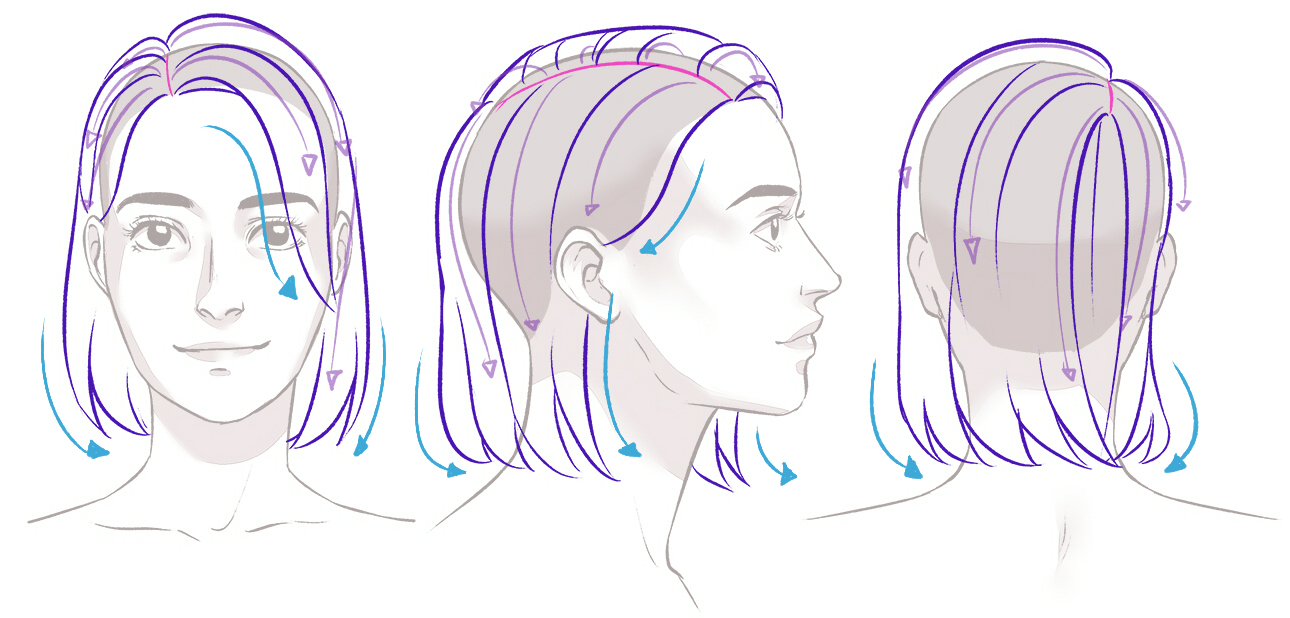
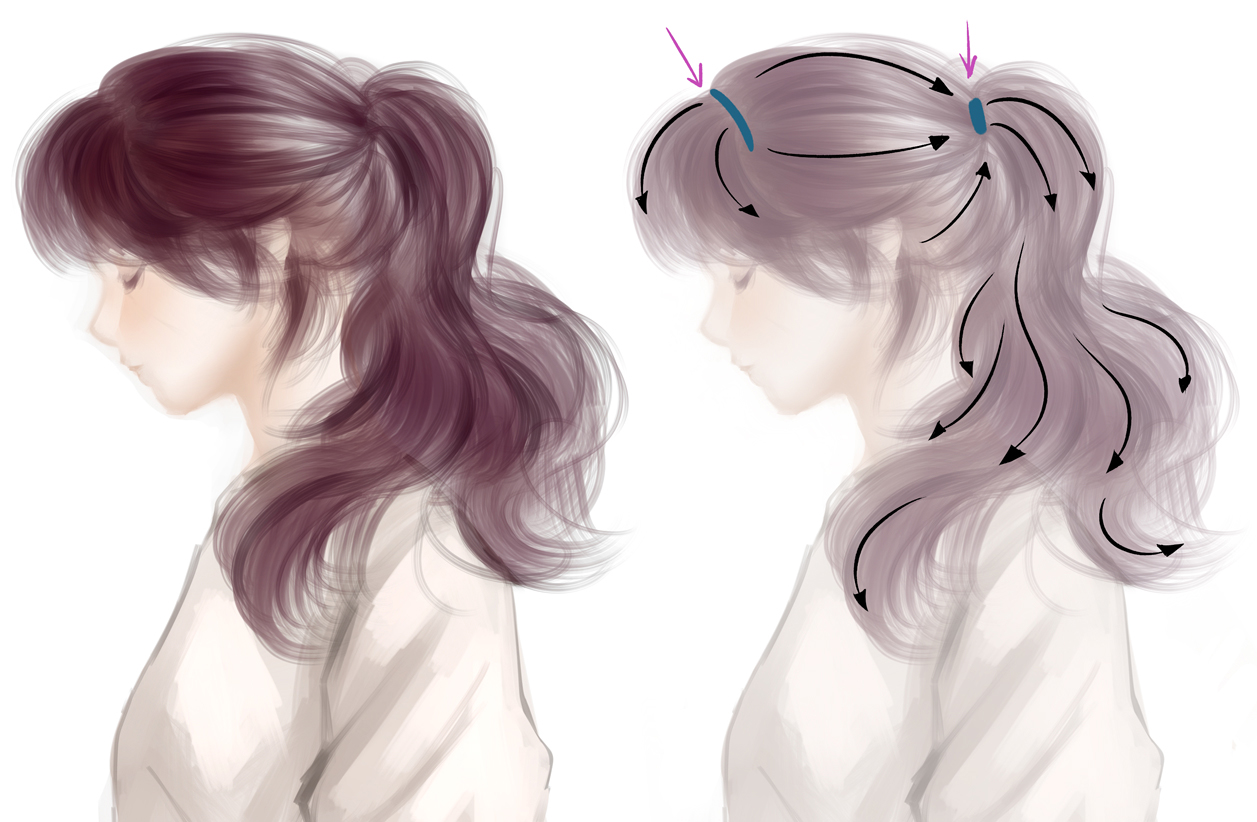
Each hair comes from a specific point and grows in a different direction. Even when the hair is very long, the gravitational force eventually brings it down.
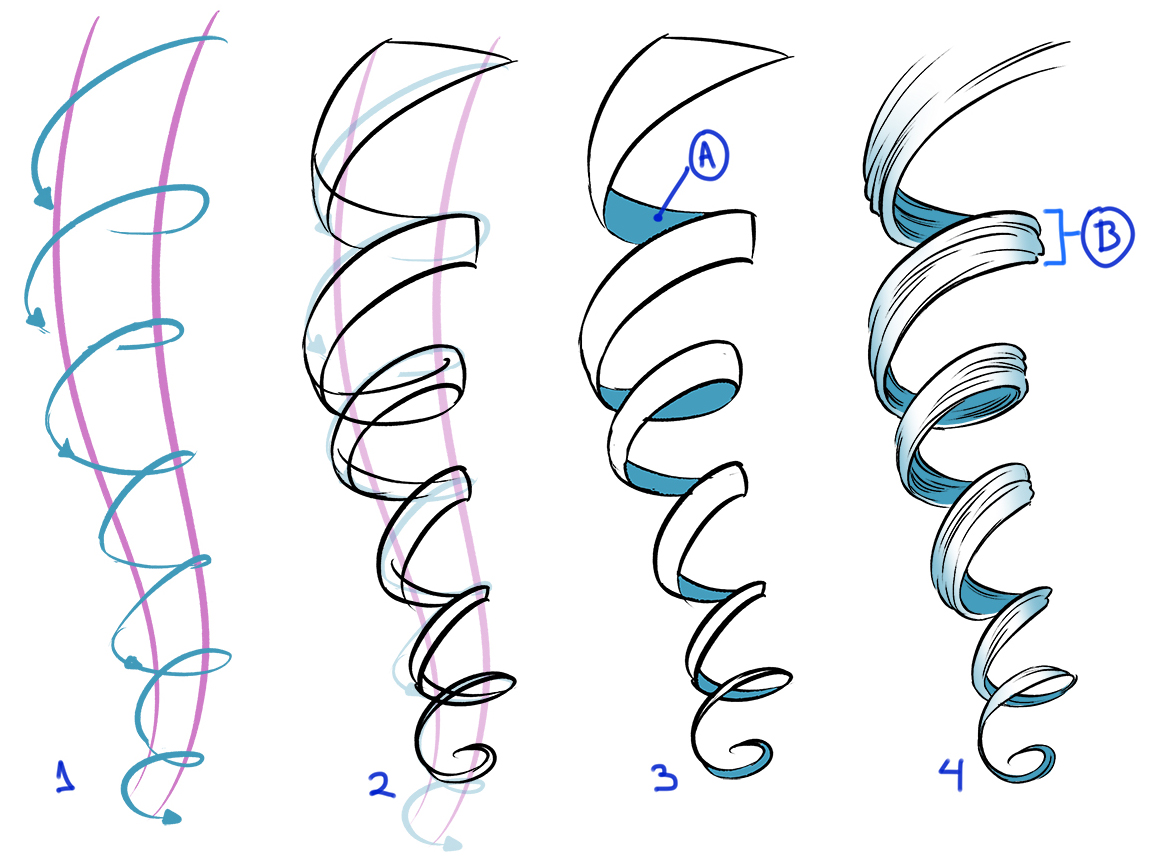
Hair locks must somehow wrap the head following the curves of its surface. Check the difference between these two images. Both circles have a layer around them, but A looks more like a flat shape, whereas B looks to be more spherical.

Hair does not glue itself to the head. Let's keep in mind that there is always space between strands and over layers of hair, which builds up to create volume.
• The green area (1) indicates the gap between the head and the edge of the hair.
• On the back of the head (2) there are several layers of hair, but since it's straight hair, the edges are almost unaffected, which allows a very subtle falling around the neck.
• The volume varies depending on the amount of hair on each side of the head (3).
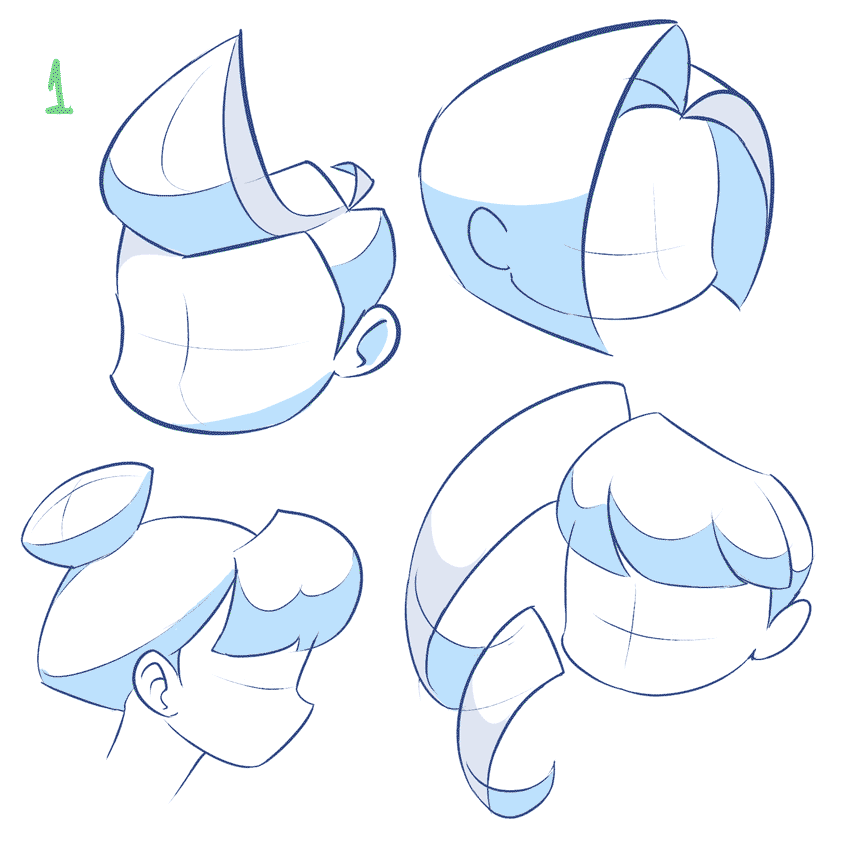
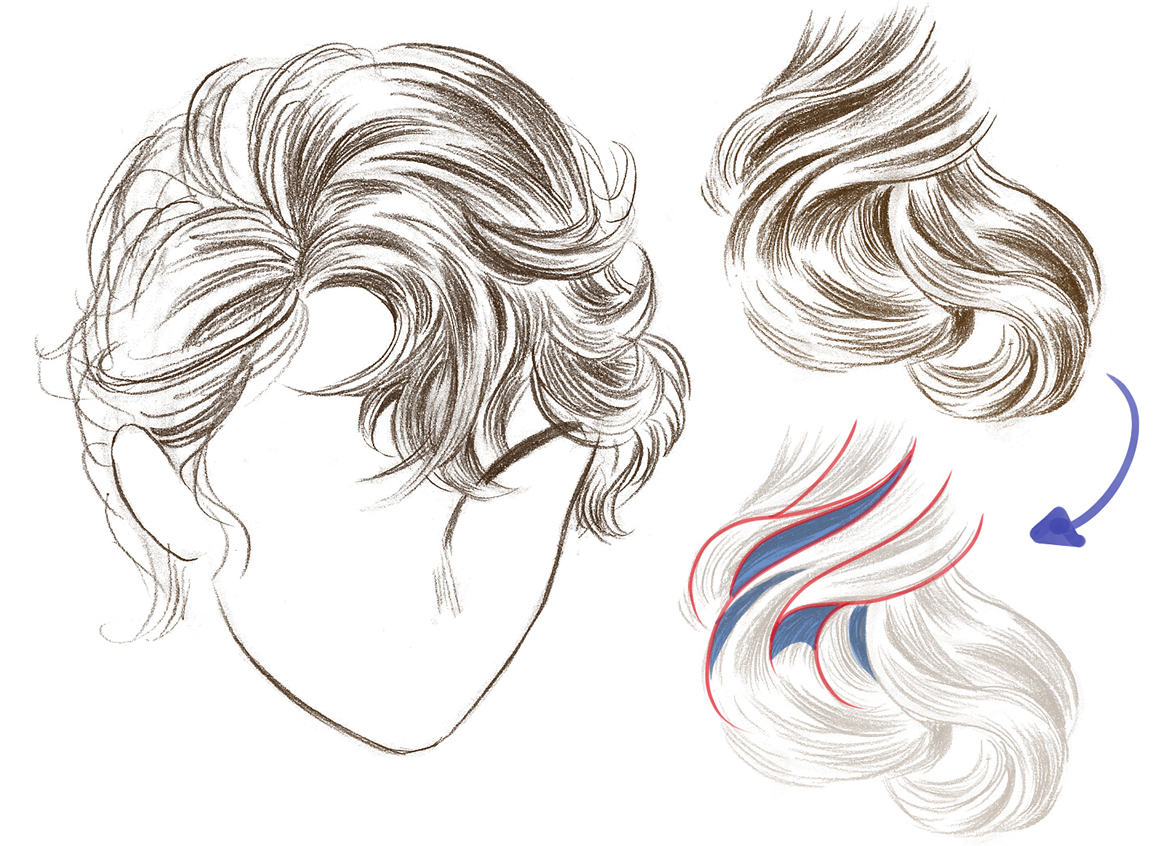
Many artists choose to simplify the hair using basic shapes, or anything else that helps them define the volume, the angles, and to easily approach values. Then they add details to the surface.
Task: I always recommend learning using real-world references. Take some photos of hair styles and identify where the locks are coming from and where they are going. You can also draw their edges.
▲Animated GIF
2. Shape:
Some drawing styles demand more effort in the detailing stage than others, but it is always necessary to take into account the standard characteristics of hair. Let's look at it this way:
The overall hair is a set of many locks > locks are a set of strands
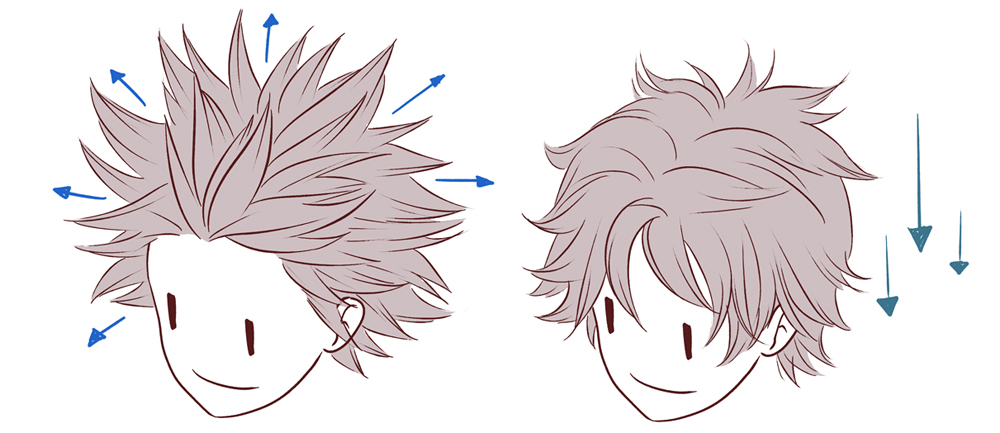
• Hair does not form a compacted shape, nor a consistent one. It is very light, so when the character moves, the wind, the humidity, or anything that surrounds it can affect its silhouette.
Let's see some examples, step by step:
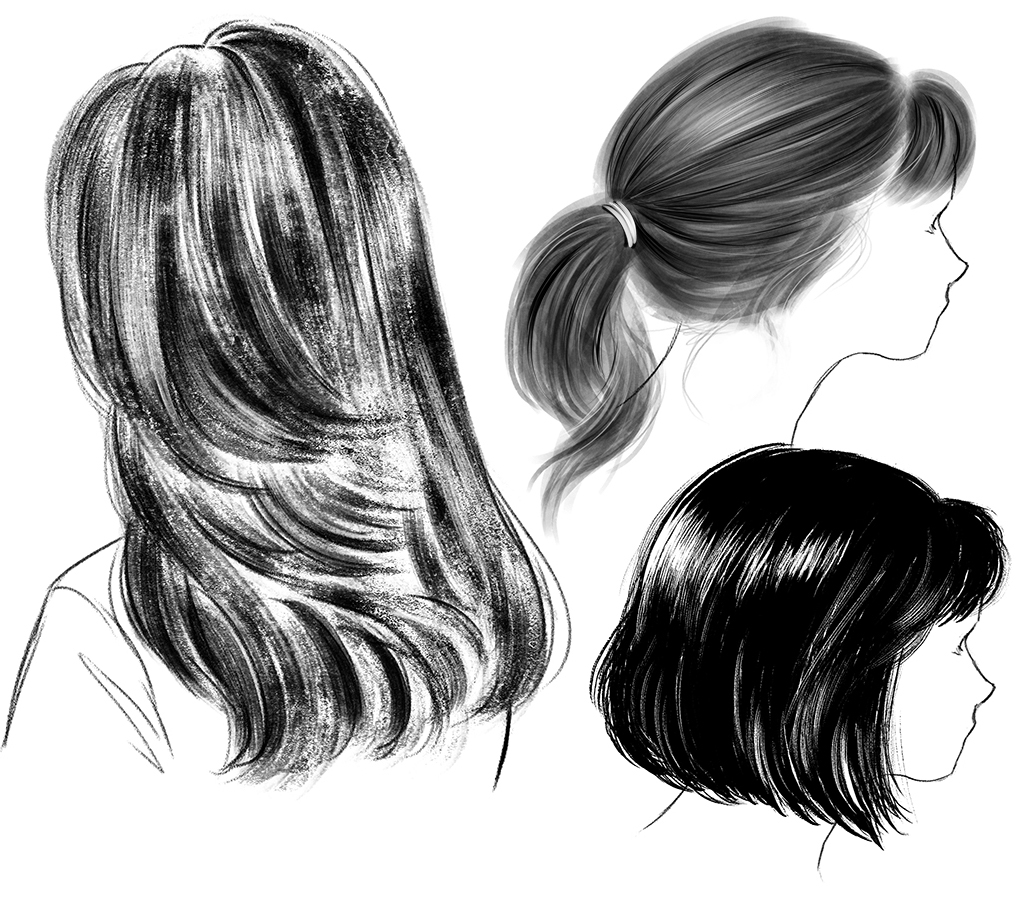
Straight hair:
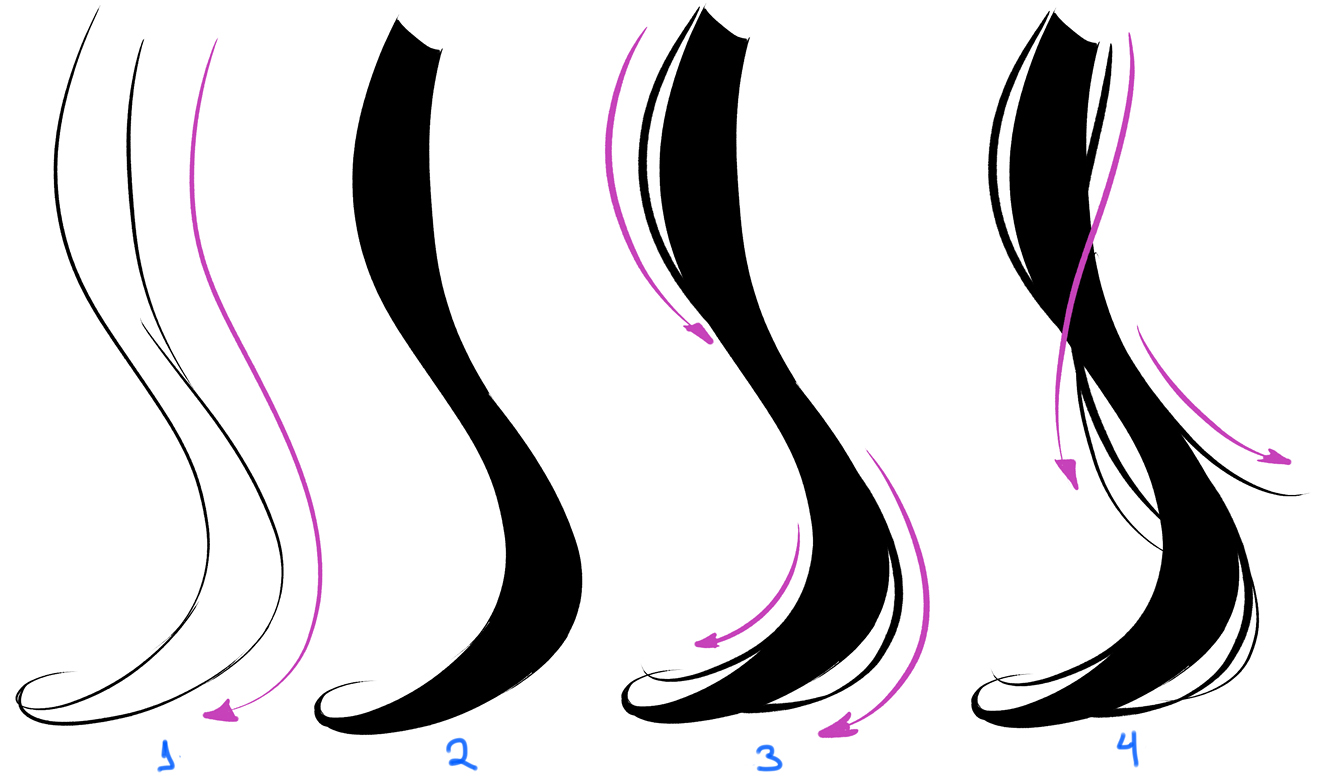
• My first step was to draw the edges of the main lock (the one which will be the base of our drawing), following the direction in a S shape. Then I filled it in to create its silhouette.
• The little strands on Step 3 follow a very similar direction, but slightly more pronounced, enough to add dynamism to the shape.
Finally, I added some strands which move in completely different directions than the original one, to balance the composition and make it more attractive.
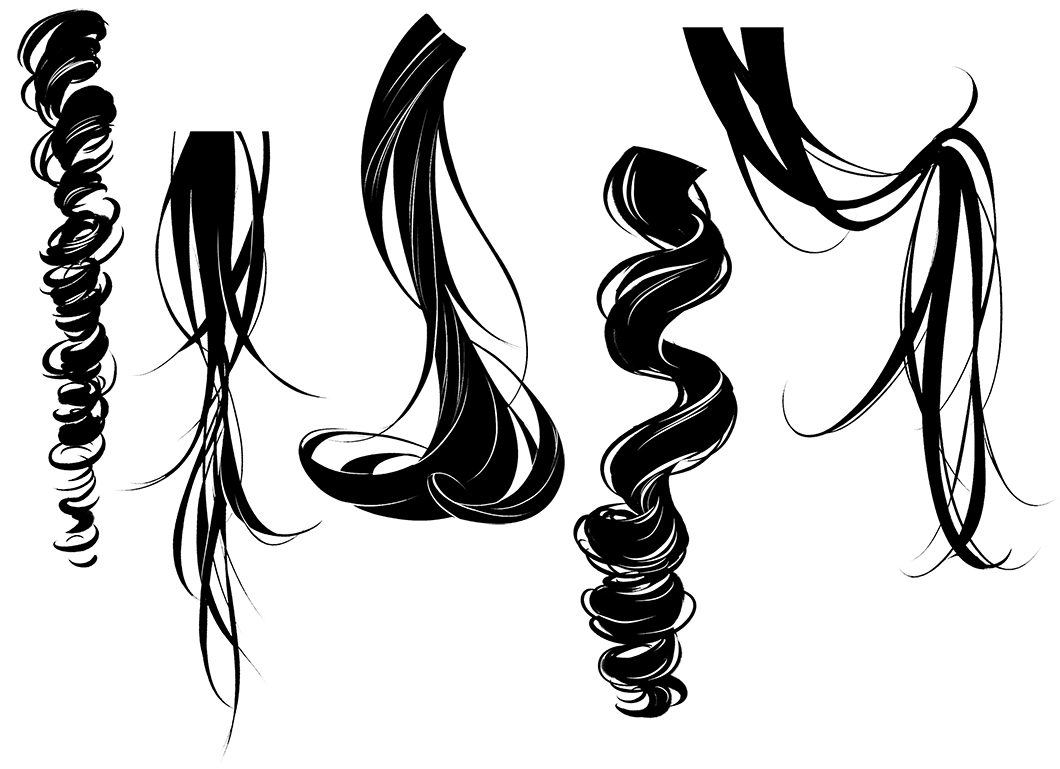
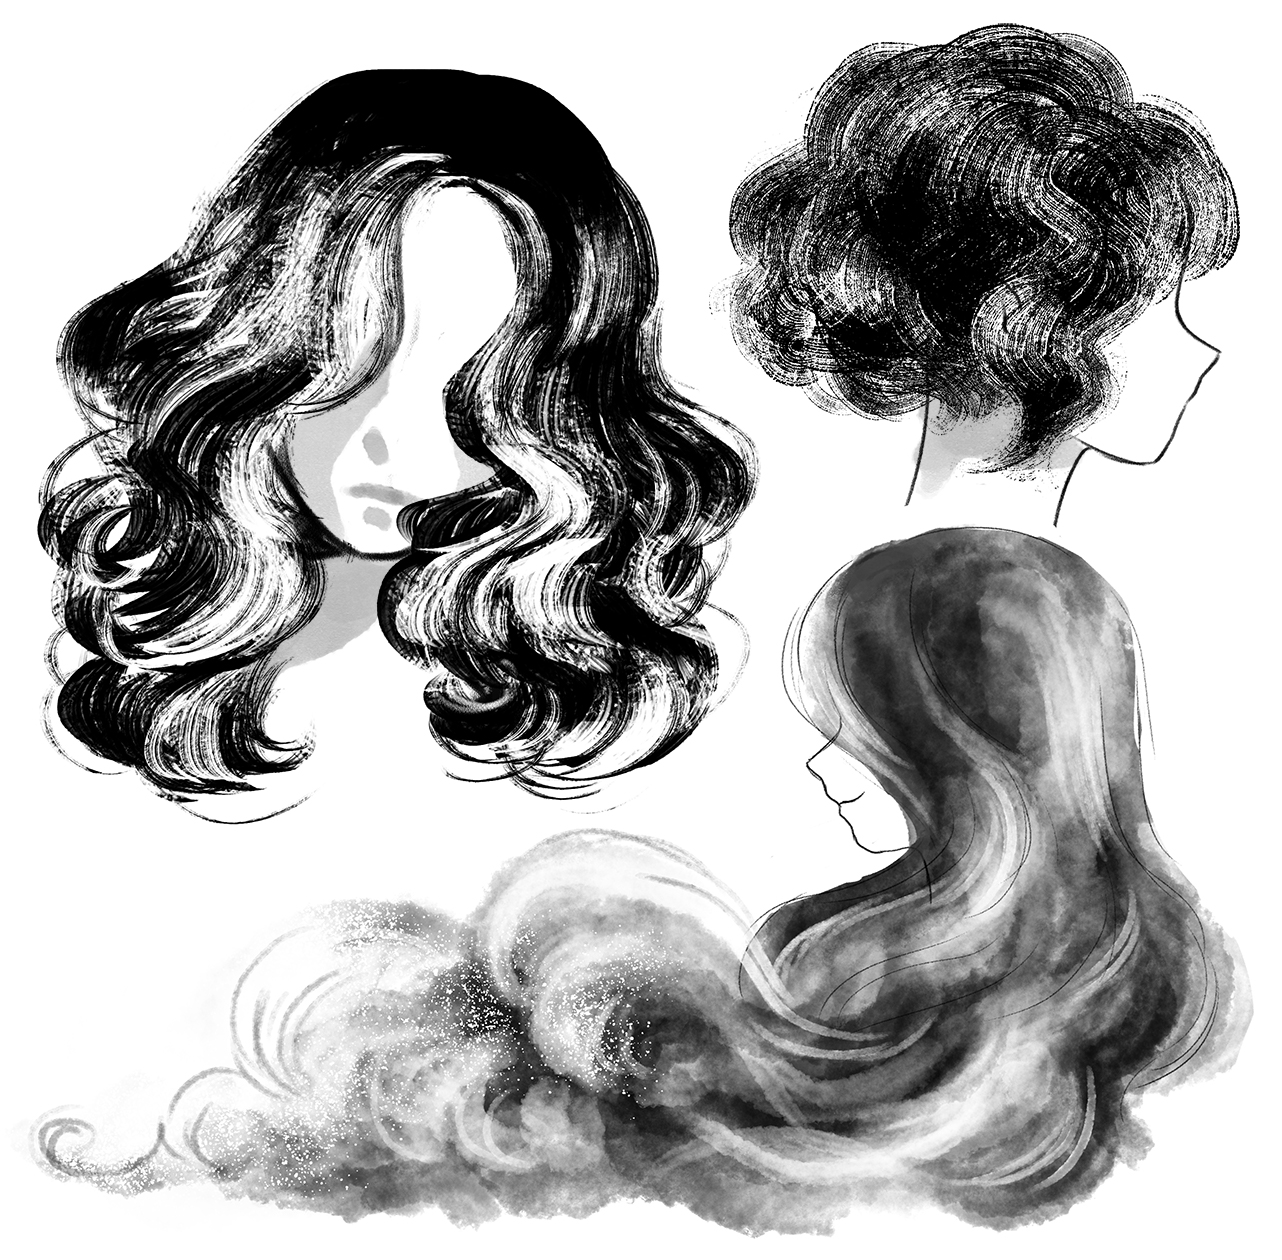
Curly hair:
• The lock curls itself around in a cylindrical shape. Try not to make this shape completely straight, otherwise the lock will end up looking like a spring!
• Then I simplify, first drawing a ribbon. See how it becomes thinner as it approaches the tip. The third step is to detail the external and internal sides (A).
• I added some texture, following the direction of the curves. I also put in some irregularities around the edges to match the surface (B).
We can use this method to create more interesting and complex silhouettes:
I followed all these criteria to brush up my character and then I added the necessary amount of detail while keeping it simple.

3. Adding values:
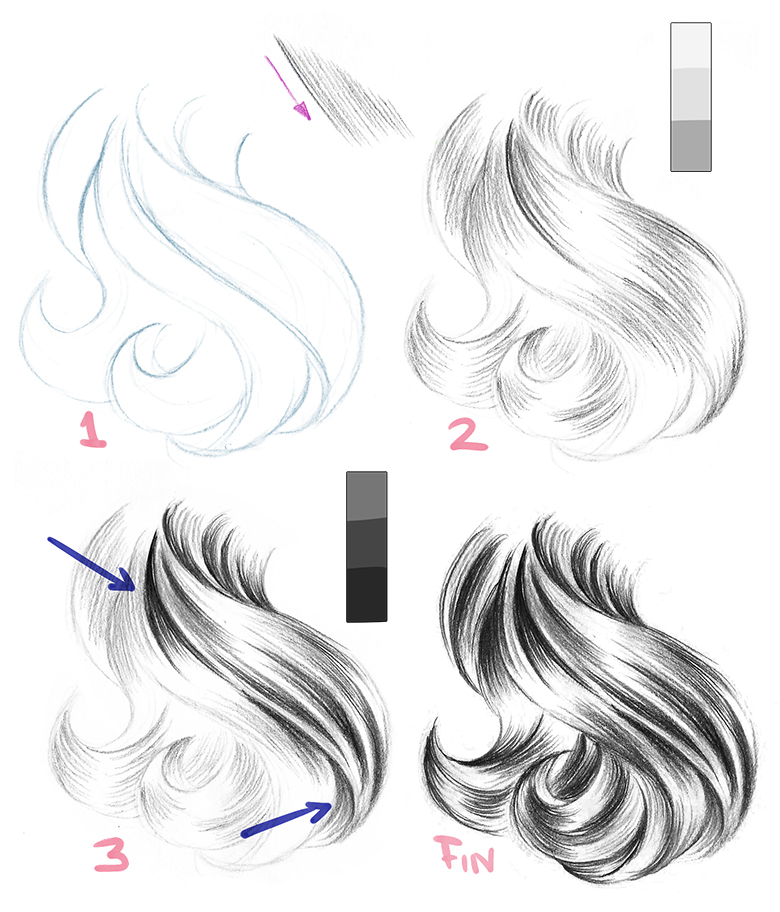
I am going to use the value scale to define details and give a 3D effect to the shapes.
The below image is a hairstyle consisting of irregular layers and overlapping locks. If we only had the silhouette, we wouldn't notice all these details, thus I need to contrast the different sections in order to highlight these shapes.
This is the step-by-step process which will help us understand better:
• I define the edges (1). In step 2, the mid-tones can be seen in the corner; the strokes follow a single direction to maintain the harmony of the shape, and the illuminated areas are left blank.
• In step 3, we apply darker shades to darken and deepen some areas, for example, on the overlapping layers as indicated by the arrows. I continue this way until the drawing is finished.
It is not a problem if we are merely guided by our intuition when drawing shadows and lights. "Lighting" is an extensive and super interesting topic, and I am afraid that what I explain here is not enough to cover it! I'd recommend researching and practicing as much as possible.
Hair types and textures:
Textures make unique sensations and enrich our illustrations. It may be overwhelming to think about hair textures, but instead of working exclusively with lines, we must not reject other tools that can make tasks easier as well as creating incredible effects, both in digital and traditional art spaces. It is always good to experiment to develop methods that highlight the qualities of our style!
I don't have a unique answer to which tool to use in each case, but here is a clue: imagine the feeling of each type of hair!
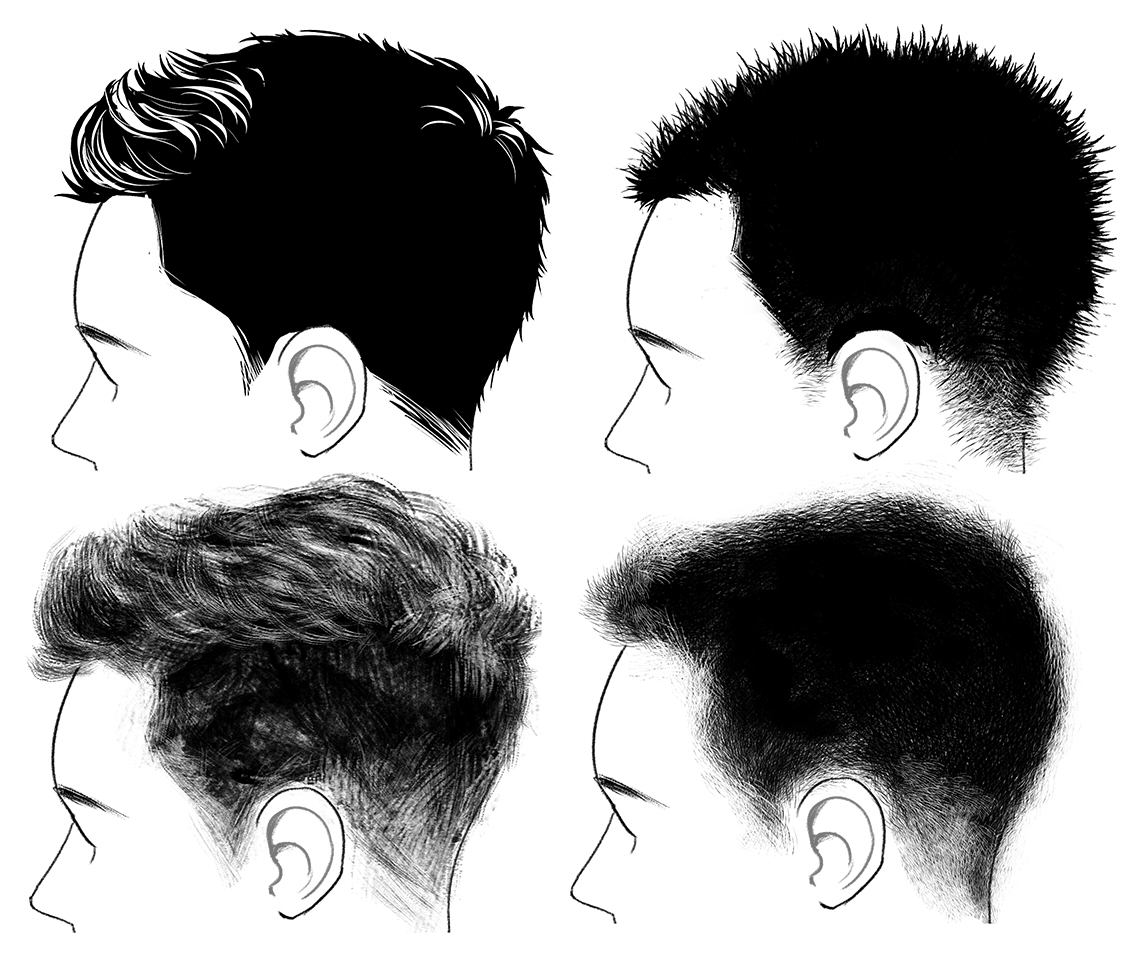
Short, almost shaved hair feels like a carpet —I've always thought so! And when I draw it, I like to give it a prickly, pointy, rough appearance.
For wavy hair, I think about the sea waves, curves finding one another. There is life, energy, and movement.
On the other hand, straight hair has serene, calm, simple and maybe elegant lines.
Explosive —but not too much, curly hair is voluminous, hard to control and, many times, hard to comb! Fluffy, soft, playful and gorgeous, those are some adjectives we can think about. Textures save time and add complexity to the shapes.

Conclusion:
These are all general approaches that use can use to make hair look like hair. If you want to go further, break the rules! There is nothing wrong in, for instance, ignoring gravity, or exaggerating the volume of hairstyles, or creating hair made of fire! There are so many possibilities we can play with to create new things. I hope this article has been helpful for you. If you wish to see some of my works, please have a look at my social networks and my portfolio:
https://www.instagram.com/eri_duh/
https://twitter.com/eri_duh
https://www.artstation.com/eridey
Thanks very much for reading!
mcchristianantionce.blogspot.com
Source: https://www.clipstudio.net/how-to-draw/archives/159719
0 Response to "How to Draw Human Hair"
Post a Comment